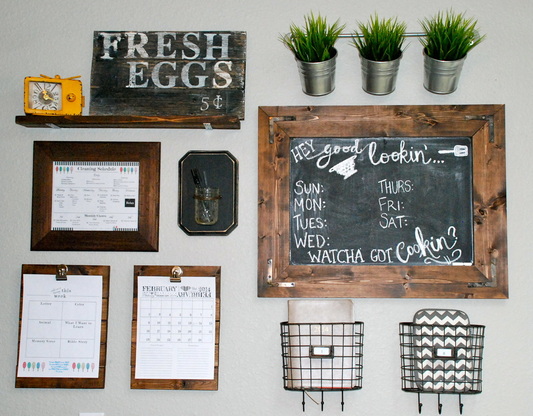
When I was designing my Kitchen Command Center and figuring out exactly what I needed, it was quickly apparent that I needed a clipboard. I am terrible about sitting down to erase and re-write the days of the month on a generic dry erase calendar, and I also wanted to easily and quickly replace our Weekly Preschool Calendar.
So, my clipboards were born. :)
So, my clipboards were born. :)
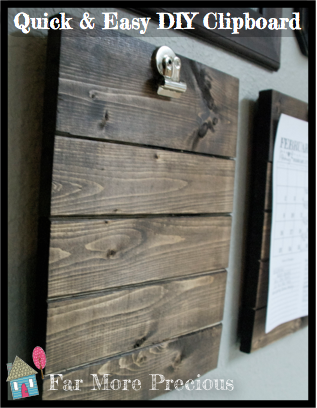
They are 13" x 9.5" Just larger than a standard sheet of paper.
Want to make one? Here's how...
What you'll need: (To make 2 clipboards)
2- 1x4 boards cut to 9.5"
8- 1x3 boards cut to 9.5"
A thin board at least 11" tall, to attach all of the boards together.
D-Ring Hangers like these from Lowe's. Not affiliate links, just sharing. :)
Clips (I bought magnetic ones like these from Lowe's.)
Paint or stain of your choice. I used Minwax Dark Walnut.
Wood Glue
First, cut all of the boards to size and sand them.
Stain or paint them, and let dry. I stained them after putting it together, and it makes it very difficult to get the stains in the cracks. Shoulda thought that out a little more... :/ So, do this step before putting it together!!!
Then, line them up with the right sides facing down. (I put 1 1x4 board with 4 1x3 boards underneath it.) Put your thin board on the back and center it. Then, screw each board in. After each screw, re-check that your boards are all still lined up and straight!
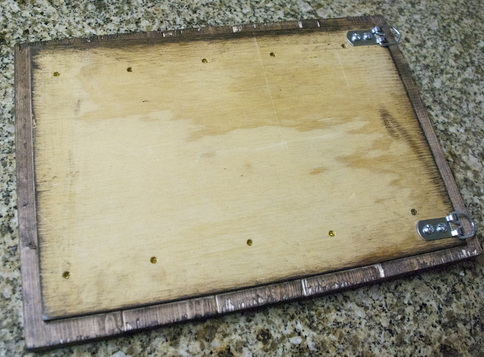
Add your D-Ring hangers to the back, and then use wood glue to attach the clip to the front!
Let it dry and you are done!
See? Super easy and quick project! And really useful too...
Let it dry and you are done!
See? Super easy and quick project! And really useful too...
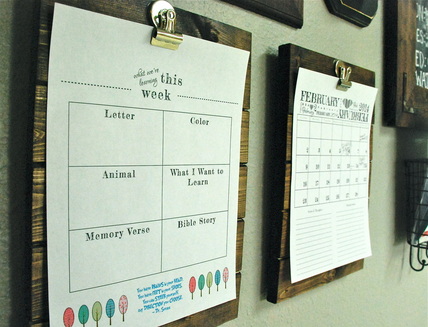
Have y'all been creating and organizing lately? If so, tell me about it in the comments below!


 RSS Feed